Okay, so.. I was recently affected by what seems to be the start of a larger problem on Evony – IP connection limits!! After the new year I was starting to be plagued with the now dreaded (on some servers) “Security Error”. It turns out Evony is now limiting how many accounts/players can connect to Evony servers via one single IP address. The Evony server I play on has been limited to 100 accounts per IP, but I’m seeing in forums that some servers have been limited to as little as 3 accounts/players connected per IP!!
As a 6+ year Evony veteran, and 5.9+ year Evony botter, I’m used to IP bans and how to get around them by setting up my machine (computer/server) with one of the various VPN protocols (PPTP, L2TP, VPN) and “routing” my machine/network’s internet activity to another machine’s internet connection some where else, effectively changing my IP. However, the problems with most VPNs is they route my machines entire internet activity, this means all the applications and software on my machine will run through the VPN and alternate IP – thus making it difficult to utilize multiple IPs at once without using multiple computers/machines.
So.. What do I do if I have 17 Evony accounts and the server I play on gets limited to 5 accounts per IP? Use 4 computers/machines and 3 VPNs?? That’s a pain in the ass.. What if I have some beastly 4Ghz 16-Core Server with 64gb of RAM that could possibly run 400+ accounts, but the extremely competitive and bot-heavy server I play on gets limited to 50 accounts per IP? That would really suck to have all that horsepower and not be able to use it.. So, how do I route some of my bots through an alternate IP, and the rest through another alternate IP? How do I route 1/3 of my bots through my real IP address, and then the other 2/3 of my bots through 2 alternate IPs??
The solution to Evony IP Connection Limit problems is a Proxy – more specific to this situation, multiple Proxies!
What is a proxy you ask?? Similar to a VPN, a proxy “routes” your internet activity to another remote machine some where else in the world, changing your IP address. However, properly configuring a decent “proxifier” will allow you to route only SOME of your applications/software, via the .exe executable file, through different proxies while allowing you to still use your real IP address for other applications/software. You can even put your entire machine behind a VPN connection and then also use multiple proxy connections. You can even “tunnel” through two or more proxies at a time for extra security if you really want to hide your real IP, however I’m not sure why you would need that much security to bot on Evony.. 
Things you will need to Beat the New Evony IP Connection Limits with Proxies and NEATBot:
- Proxies – Socks4 or Socks5 only! HTTP/HTTPS proxies won’t work.
(Get some proxies for Evony here)
- “Proxifier” program – Self-titled proxifier app, there are others that would work. (Proxy Switcher Pro, perhaps?)
- NEAT####.exe – An up-to-date version of the latest NEAT.exe executable file.
- “The Director” – I’d assume you are already using this if you have multiple accounts..
Proxifier and NEATbot Overview:
- NEAT.exe Preparation
- Proxifier Install/Setup
- “The Director” Configuration
NEAT.exe Preparation:
Okay, first.. I assume you have your NEAT.exe in a designated folder/directory with TheDirector.exe on your “desktop” or “My Documents” some where, if not, I recommend doing so for organizational purposes.. don’t just run TheDirector and NEAT from the desktop, it can get messy.. especially if you use Global Goals and/or parameter start-up scripts.. and you also run the risk of accidentally deleting scripts, goals, or even essential TheDirector files. My NEAT.exe and TheDirector.exe are located in a folder named “NEAT” on my desktop – see image below.

Next, you will need to place your NEAT.exe executable in the NEAT folder/directory that you have your TheDirector.exe executable in, if it’s not already there. Then, make a duplicate copy of the NEAT.exe for each different proxy/IP you plan on using. I am setting up 3 alternate proxy IPs, so I have 3 copies of my NEAT2995.exe named “NEATProxy1.exe”, “NEATProxy2.exe”, and “NEATProxy3.exe” – see image below.

Proxifier Install/Setup:
Now, open Proxifier and click “Profile” on the top menu, then “Proxy Servers..” – see image below.

Then click the “Add…” button on the Proxy Servers window once it appears – see image below.

Now enter your proxy’s IP/URL, Port number, select the proxy type, and click the “OK” button to save your proxy server – see image below. (If you want to use Proxifier to make sure your proxy server is functioning, go to the next step before clicking “OK” to save.)

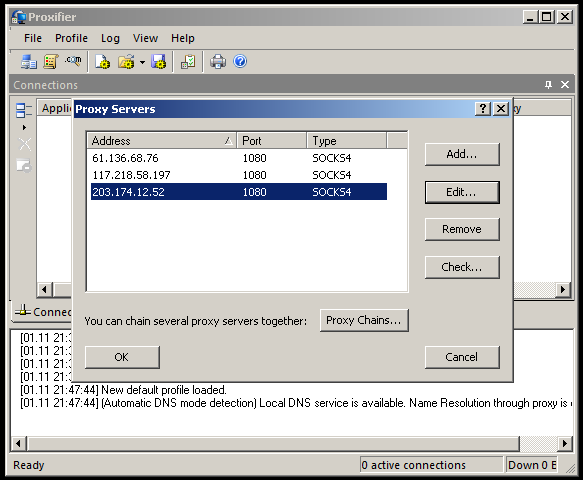
You may click the “Check” button too make sure your chosen proxy server is up and running. If everything checks out fine, just click ‘OK” on the Proxy Checker window and then “OK” again on the Proxy Server window to save your new proxy server and continue – see image below.

Now, repeat the two previous steps until all of your proxies are entered into Proxifier. Once complete, click “OK” on the “Proxy Servers” window – see image below.
Now, to setup which NEAT.exe files Proxifier uses with each proxy, click “Profile” on the top menu, and then “Proxification Rules…” – see image below.

Click the “Add” button on the “Proxification Rules” window that appears – see image below.

Then, give your new rule a name, such as “NEATProxy1″.
Next, assign Applications to the first proxy by using the “Browse” button to navigate to your NEAT folder (mine’s on my desktop, remember?) and then select the first NEAT.exe that you renamed (“NEATProxy1.exe” if you are following this guide without deviation) – you can also just type the executable’s name followed by a semicolon, and skip the “Browse” button.
Leave the Target Hosts and Target Ports options set to “any”, the default.In the “Action’ drop-down box, select the first Proxy you entered into Proxifier and then click the “OK” button to save your first Proxification Rule – see image below.

Next, repeat the last two steps setting up new “Proxification Rules” for each of the separate NEAT.exe files you renamed and the Proxy Servers you saved to Proxifier – see image below. (I also like to use the Up/Down arrows on the left of the “Proxification Rules” window to order my rules in order of use, starting with the top being first used proxy, and bottom being the last used proxy. This is just for organizational purposes so proxies are easier to distinguish/find when I need to switch them out.)

Now that you are done with your Proxy Servers, and Proxification Rules, it’s time to set Proxifier to auto, as well as save everything. First, in the top menu click “File” then in the drop-down click “Autostart” to make Proxifier start automatically when Windows loads. Next, click “File” in the top menu and then “Save Profile As…” to save all of your freshly setup Proxifier settings, rules, and proxies to a new profile, I named mine “NEAT” – see images below.


“The Director” Configuration:
Now all that is left to beat the Evony IP connection limit with NEATbot and proxies is to set your “The Director” to use the newly created, and proxified, NEAT.exe files you created/renamed previously. Assuming you have already been using The Director to run your NEATbots, this should be an easy/quick task. If your “The Director” is not already setup to manage your accounts, set it up first before continuing.
The only task in The Director is to change which NEATbot NEAT.exe executable file that your accounts use when starting, and there are two ways to do this. But first, set your The Director’s “Auto-Restart” option to “Regular” instead of “Enable” so no bots are restarted/maintained while we edit profile info – see image below.

So, the first way to assign which NEATbot executable your accounts launch with is the manual way, and to do it you highlight the account name in The Director, then click the “Account Details”. In the “Profile Settings” window that appears, click the “set” button next to the “Profile Bot” blank at the bottom of the window – see image below.

In the “Select File” window that appears, browse to the first NEAT.exe executable we renamed, “NEATProxy1.exe” if following this guide without deviation, then click the “Open” button – see image below.

You will now see the new path to the NEAT.exe to use in the “Profile Bot” blank , the first proxified one we created. Click the “Save” button at the bottom of the “Profile Settings” window and then repeat the two previous steps for ALL the accounts and different proxified NEAT.exe files you created – see image below.

The second method for changing which NEAT.exe files The Director uses for each account is much faster, but might be scary to the less “tech savvy” Evony botters… Click the “View” button in the top menu and then “Edit All Profile Info”, this will bring up a new window where ALL account settings can be edited from one page/view. Find the “Specific Exe” column and fill in the blanks with the paths to the desired NEAT.exe file for each account. Once all accounts in the list have their “Specific Exe” value changed to the desired path, click the “Editing Complete” button at the bottom of the window – see image below.

Proxifier and NEATbot Completion:
Now that you have finished setting up your NEAT.exe files, your proxies and proxifier, and have changed The Director to use your proxied NEAT.exe files.. the only thing left to do is start your accounts! (Or, set Director back to “Enable” if you changed it to “Regular” earlier, and then restart your accounts!)
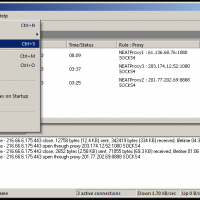
Keep the proxifier window/log open and you will be able to see it working, routing all of the different NEAT.exe traffic through the different proxies, giving them new IP addresses. 
 In my tutorial I’ve setup just 4 accounts using 3 proxies and also my real IP address. Of course, you can see how this could be done on a larger scale, for example: 5 proxies with 50 feeder accounts on each, plus 50 main accounts running “direct” through the real IP address, for a total of 300 accounts running on one Evony server limited to 50 accounts per IP address. Alternatively, if you are in one of the more strict servers you might need to restrict The Director to only running 5 accounts per proxy, so just 25 accounts would need at least 4 proxies – which is still better than using VPNs and needing 5 different machines!!Enjoy!
Note:
Not all proxies are the same, and some of the shared/public proxies can be unsecured – even monitored. Using shared/public proxies can be a free, however, be SURE to only use them for accounts you don’t mind a slight chance of possibly losing, and NEVER use a shared/public proxy for routing personal information. (In other words.. Don’t setup your web-browser to run through a shared/public proxy and then login to your online banking account! That info could be logged…) Private proxies can be bought/rented – this is the most safe route. Besides.. scraping shared/public proxies can be a pain in the ass..
Note 2:
Don’t use the proxies shown in this tutorial – they are shared/public proxies I grabbed JUST for making this tutorial – they are slow, probably unsafe, and horribly unreliable.
Update:
This article was also shared on the NEAT Bot website’s forum, and was eventually closed for further discussion after these replies from admin Inanna.
“by Inanna » Fri Feb 14, 2014 7:18 pm
You don’t need proxifier anymore now… the bot can support it built-in. Check out the change log on the last 3 test builds  “
“
and
“by Inanna » Tue Feb 18, 2014 8:40 pm
Closing this for now since there’s no longer an IP limit on Evony. No need for us to continue freaking out about potential new systems they’re planning and haven’t yet added.”
Update 2:
A few months after writing this guide, my server was limited to just 3 accounts per IP and I switched to the newer/faster method of using TheDirector and a Proxy List. I also updated this guide a bit for this still using this method.
So, you may continue using this method, or try out the NEAT Bot’s new proxy features. Personally, I like managing my proxies in a proxifier as opposed to managing them individually in applications. Good Luck!